Have you ever felt your heart skip a beat when your brakes feel weird after a fluid change?
Most car owners panic when something seems off with their brakes, worried they might have just created a dangerous situation.
What if I told you there’s a simple, step-by-step way to ensure your brake system is 100% safe after adding new fluid?
In the next few minutes, you’ll discover the five essential checks that will give you total peace of mind.
These aren’t complicated mechanic tricks, just easy steps any driver can do to avoid potential brake disasters and keep their family safe on the road.
What Should You Do After Adding New Brake Fluid?
Here are five essential steps you should take after adding a new brake fluid:
Check For Leaks In The Brake System
After adding new brake fluid, it’s important to check for leaks in the brake system to make sure everything is working properly.
Leaks can cause a drop in brake fluid levels, which can affect your vehicle’s braking power and make your car unsafe to drive.
Here’s how you can inspect for brake fluid leaks in a simple, step-by-step way.
First, inspect the brake fluid reservoir.
This is usually located near the back of the engine bay.
Check if the reservoir has any cracks, or if fluid is overflowing or leaking around it.
If you see any signs of brake fluid outside the reservoir, it might mean the cap isn’t sealed properly or the reservoir itself is cracked.
Next, check the brake lines and brake hoses that run from the master cylinder to each wheel.
Look for any wet spots or drips along the lines.
Brake fluid leaks are often visible as small puddles or stains on the ground where your car is parked.
If you spot wetness or signs of fluid dripping from these parts, it may indicate a leak.
Brake calipers and the brake master cylinder should also be checked.
Look around the calipers for any fluid leaking, especially where the brake line connects to the caliper.
You should also inspect the master cylinder for any fluid around the seal or beneath it.
If you find any leaks or wet spots, it’s best to get the brake system checked by a professional to prevent serious problems like brake failure.
Bleed The Brakes To Remove Air Bubbles
Bleeding the brakes is another essential step you need to take after adding new brake fluid.
If air bubbles get trapped in the brake lines, your brake pedal may feel soft or spongy when you press it.
This happens because air in the brake lines reduces the pressure, making it harder to stop the car.
Removing air bubbles from the brake lines is important for safe driving.
Here’s how you can bleed the brakes yourself:
Gather The Tools:

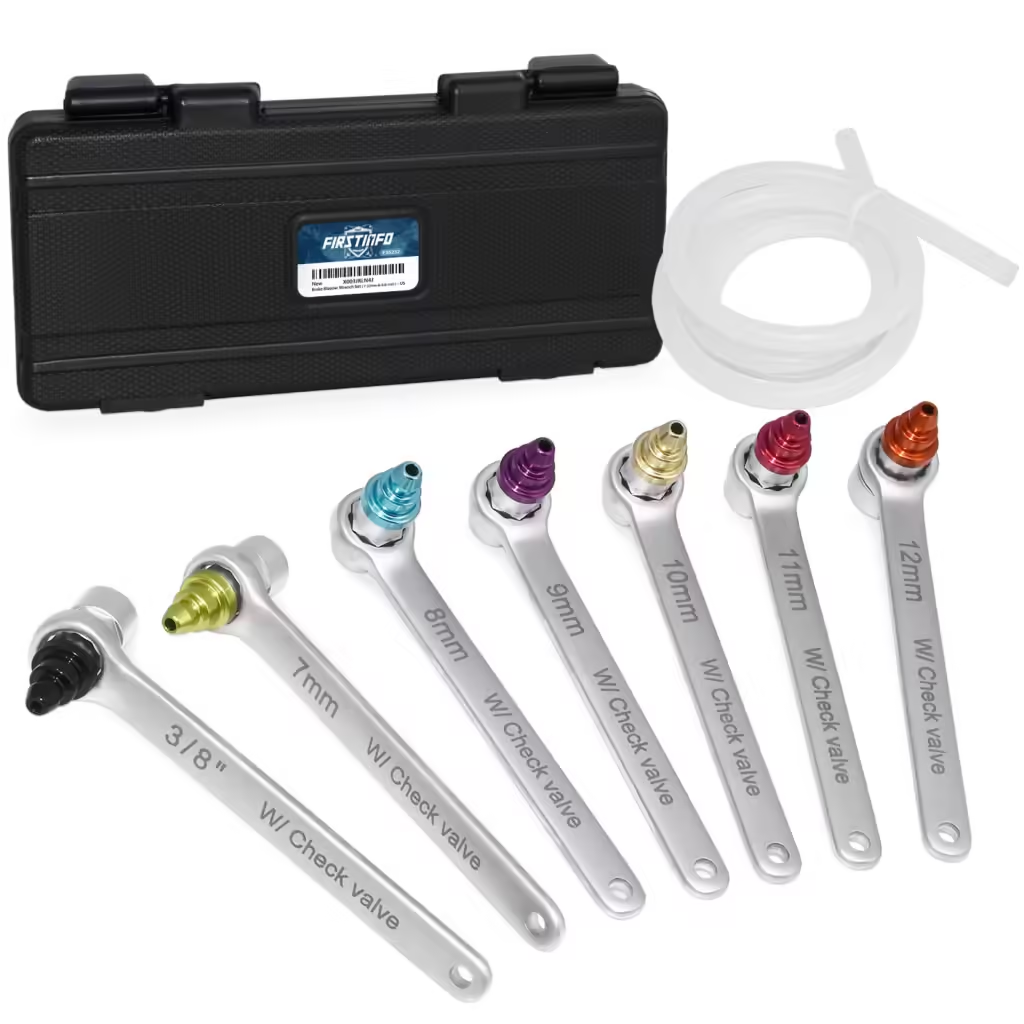
You will need a brake bleeder kit, a wrench, and a helper.
The brake bleeder kit will help you remove the air from the brake lines easily.
Make sure you have some brake fluid on hand to top off the reservoir as needed during the process.
Locate The Bleeder Valve:
Each wheel has a bleeder valve near the brake caliper.
This valve is where you will release the air from the brake lines.
Start With The Furthest Wheel:
Begin with the wheel farthest from the master cylinder (usually the passenger-side rear wheel).
Attach the bleeder kit to the valve, and have your helper press the brake pedal slowly while you open the valve.
Once the pedal reaches the floor, close the valve before your helper releases the pedal.
You will see brake fluid mixed with air bubbles coming out. Repeat until only clear brake fluid flows.
Move To The Other Wheels:
Next, move to the next furthest wheel (passenger-side front), then to the driver’s side rear, and finish with the driver’s side front.
Check The Pedal Feel:
After bleeding all the brakes, check the brake pedal.
It should feel firm and not soft or spongy.
If it still feels soft, repeat the bleeding process.
Test Brake Pedal Pressure
Testing your brake pedal pressure is an important step to ensure your brakes are working properly after maintenance, like adding new brake fluid or bleeding the system.
This helps you confirm there are no problems like a spongy or soft brake pedal, which could affect your ability to stop the vehicle safely.
To test the brake pedal pressure, follow these steps:
Press The Brake Pedal Firmly:
Start by sitting in the driver’s seat with the car off.
Push down on the brake pedal slowly but firmly.
The pedal should feel solid and not soft or spongy.
A firm pedal usually means there is proper pressure in the brake system.
Check For Changes In Pressure:
Hold the brake pedal down for a few seconds.
If it slowly sinks to the floor, it could indicate a problem, such as air bubbles in the brake lines or a leak in the hydraulic system.
Start The Car:
With the engine running, press the brake pedal again.
It should still feel firm but might go down slightly due to the power assist system.
If it feels too soft or unresponsive, there could still be an issue with the brake fluid, master cylinder, or brake lines.
If your brake pedal feels soft, spongy, or unresponsive, you may need to recheck for air bubbles, inspect for leaks, or bleed the brakes again.
Top Off The Brake Fluid Reservoir
After completing brake maintenance, such as bleeding the brakes or testing the pedal pressure, it’s also essential to check and top off the brake fluid reservoir.
This step provides your brake system has enough fluid to function properly.
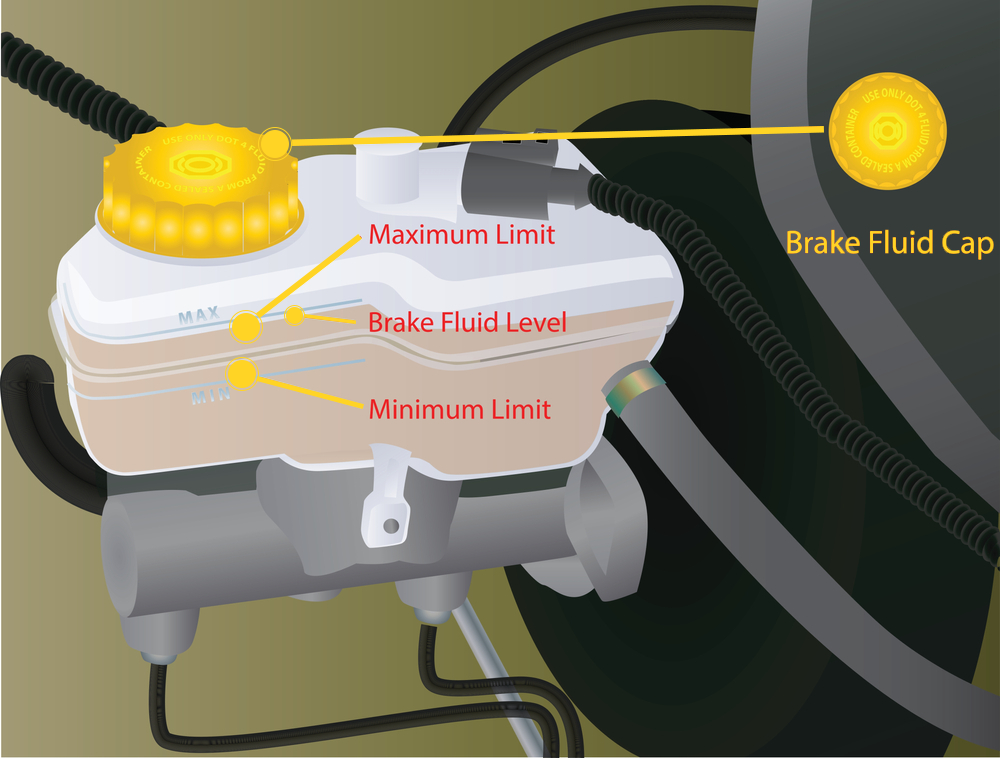
Start by locating the brake fluid reservoir under the hood.
It is usually a small, clear container with “MIN” and “MAX” lines to indicate the proper fluid levels.

Make sure the car is on a level surface and the engine is off before you begin.
First, check the fluid level.
If it’s below the “MAX” line, you’ll need to top it off.
Use only the recommended type of brake fluid for your vehicle, such as DOT 3, DOT 4, or DOT 5, which you can find in your owner’s manual or printed on the reservoir cap.
Avoid mixing different types of brake fluid, as this can damage the system.
Carefully remove the brake fluid cap to prevent any debris from falling inside.
Slowly pour the fluid into the reservoir until it reaches the “MAX” line.
Be careful not to overfill, as this can cause pressure issues in the system.
After refilling, securely replace the cap and clean up any spilled fluid.
Brake fluid can damage paint, so wipe any drips immediately.
Regularly checking and maintaining the proper brake fluid level ensures your hydraulic brake system works smoothly and reduces the risk of brake failure.
Perform A Controlled Brake Test
A controlled brake test helps you check if your brake system is functioning correctly and identifies any issues, like spongy brakes or uneven stopping.
This step gives you peace of mind before you take your car back on the road.
To start, choose a safe and open area, such as an empty parking lot or a quiet street.
Make sure the surface is flat, and there’s plenty of space around you to avoid any risks.
Begin by turning on your vehicle and pressing the brake pedal.
The pedal should feel firm and responsive.
If it feels soft or spongy, this could mean there’s still air in the brake lines, and you may need to bleed the brakes again.
Once the brake pedal feels normal, drive at a low speed, around 5 to 10 mph, and press the brakes gently.
Your car should stop smoothly and without pulling to one side.
If you notice uneven braking, it might indicate an issue with the brake pads or hydraulic brake system.
Also, test the brakes at a slightly higher speed, such as 20 mph, to check the stopping distance.
The car should stop quickly without any delays or unusual noises like squeaking or grinding.
If you notice any problems, such as poor brake responsiveness or the pedal sinking to the floor, address these immediately.
Either check the brake system again or consult a mechanic for help.
