A brake fluid tester is a simple tool that helps you check the quality of your car’s brake fluid.
Brake fluid absorbs moisture over time, reducing its effectiveness and making your brakes less responsive.
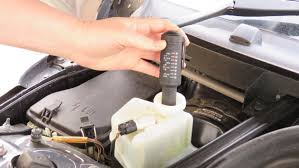
This handy device usually has a small probe that you dip into the brake fluid reservoir.
The tester then uses a chemical reaction or electronic sensors to measure the fluid’s water amount.
It often displays the results using LED lights or a digital readout.
Why Is It Important To Test Brake Fluid Regularly?
Testing brake fluid regularly is important for your safety and your vehicle’s performance.
Brake fluid plays a big part in your car’s braking system, and its quality directly affects how well your brakes work.
Over time, brake fluid can absorb moisture from the air, which can lower its boiling point.
This is important because when you apply the brakes, the heat generated can cause contaminated fluid to boil, leading to brake fade or even complete brake failure.
By testing your brake fluid regularly, you can ensure that it remains effective and safe.
One of the key reasons to test brake fluid is safety.
If the moisture level in your brake fluid is too high, it can compromise your ability to stop quickly and effectively.
This increases the risk of accidents, putting you and others on the road in danger.
Regular brake fluid testing helps you catch these issues early, allowing you to replace the fluid before it becomes a serious problem.
Another reason for regular testing is cost-effectiveness.
Maintaining good brake fluid quality can prevent costly repairs down the line.
If you neglect to check your brake fluid, you might face expensive fixes due to damaged components in the braking system.
By using a brake fluid tester every six months or before long trips, you can save money and extend the life of your brakes.
Types Of Brake Fluid Testers
Here are some examples of different types of brake fluid testers available on the market:
1. Digital Brake Fluid Testers
Digital brake fluid testers provide precise moisture readings and are easy to use.
One great example is the Cal-Van Tools Brake Fluid Tester.
This tester can measure moisture content in all types of brake fluid, including DOT 3, DOT 4, and DOT 5.1.
It features a simple two-button operation, one for power and another to switch between fluid types.
The easy-to-read LED moisture gauge allows you to quickly see if your brake fluid needs replacing.
2. Manual Brake Fluid Testers
For those who prefer a more straightforward approach, manual brake fluid testers are a good option.
The AMiO Brake Fluid Tester is a compact device that allows you to instantly measure the water content in your brake fluid.
It has two electrodes and five easy-to-read control LEDs that indicate the moisture level.
This tester can also check multiple types of brake fluids, including DOT 3, DOT 4, and DOT 5.1.
3. Professional Brake Fluid Testers
If you’re a mechanic or run an automotive service, you might want a professional-grade tester like the ATE BFT 320P.
This advanced tester heats the brake fluid to its boiling point and displays the temperature reading digitally.
It can print out results for customer records, making it an excellent tool for workshops that need accurate measurements and documentation.
4. Compact or Pocket-Sized Testers
For quick checks on the go, consider a compact tester like the Högert Technik Brake Fluid Tester.
This lightweight device is designed for easy use and portability.
It has LED indicators that show whether the brake fluid is safe to use or needs replacement based on moisture content.
How To Use A Brake Fluid Tester: A Step-by-Step Guide
Here’s a step-by-step guide to help you test the moisture content in your brake fluid easily.
Step 1: Gather Your Tools
First, make sure you have everything you need.
You’ll need a brake fluid tester, which can be digital or manual, and some paper towels for cleanup.
Having these tools ready will make the process smoother.
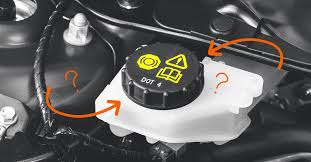
Step 2: Locate The Brake Fluid Reservoir
Open your vehicle’s hood and find the brake fluid reservoir.

It’s usually a small, clear, or white container located near the back of the engine bay.
The cap may be labeled, making it easier to identify.
Step 3: Clean The Tester
Before you start testing, wipe the probe of your brake fluid tester with a clean cloth.
This helps avoid any contamination that could affect your results.
Step 4: Dip The Tester
Carefully dip the probe of your brake fluid tester into the brake fluid.

Make sure it is fully submerged to get an accurate reading.
If you’re using a manual tester, ensure it’s in contact with the fluid for a few seconds.
Step 5: Wait For The Results
Hold the tester in place for a moment until it shows a reading.
If you’re using a digital brake fluid tester, wait for the LED indicators to display the moisture level.
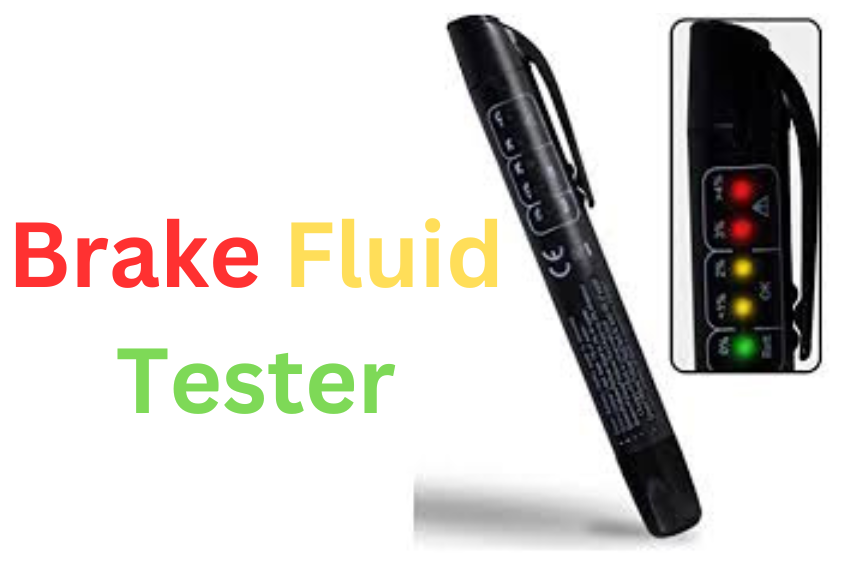
Step 6: Read The Indicators
Check the results on your tester.
Most testers will have color codes or lights:
- Green means your brake fluid is good.
- Yellow indicates low moisture content (1-2%).
- Red means high moisture content (>4%), and you should replace your brake fluid soon.
Step 7: Record Your Findings
Make a note of your results for future reference.
This is especially helpful if you need to monitor changes over time or decide when to replace your brake fluid.
Step 8: Clean Up
After testing, wipe any excess brake fluid from the probe and securely close the reservoir cap to prevent spills and keep your engine bay clean.
With that said, remember to wear gloves while handling brake fluid, as it can damage paint and plastics.
If you notice any signs of contamination, consider replacing your brake fluid immediately.
When Should You Test Your Brake Fluid?
First, it’s a good idea to test your brake fluid every six months.
This regular maintenance check helps you catch any moisture contamination early, which can affect the quality of your brake fluid.
Moisture in brake fluid can lower its boiling point, leading to reduced braking performance and potentially dangerous situations.
Also, before going on long trips, always check your brake fluid.
If you haven’t tested it recently, this is especially important.
Long drives can put extra strain on your braking system, and knowing that your brake fluid is in good condition will give you peace of mind.
If you frequently drive in heavy traffic, tow heavy loads, or go through mountainous areas, consider testing your brake fluid more often.
These driving conditions can cause your brakes to work harder, increasing the chances of overheating and moisture buildup in the fluid.
You should also test your brake fluid immediately if you notice any changes in how your brakes perform.
For example, if the brake pedal feels spongy, makes unusual noises, or if the brake warning light comes on.
These signs may indicate that your brake fluid is contaminated or that there’s an issue with the braking system.
Then again, incorporate brake fluid testing into your routine maintenance checks.
Whenever you have an oil change or tire rotation done, ask the technician to check the quality of your brake fluid as well.
