Manual brake bleeding is one of the brake fluid bleeding methods that you can use to remove air from a vehicle’s brake system.
This is important because air in the system can reduce braking efficiency and lead to a spongy brake pedal.
However, to manually bleed brakes, you’ll need to use a brake bleeder tool or syringe to remove air from the system while someone pumps the brake pedal.
This process is typically performed when replacing brake pads, calipers, or brake fluid, or if you suspect air in the system.
Tools And Materials Needed For Bleeding Brake Manually
To bleed your brakes manually, you’ll need a few essential tools and materials.
Here’s a list:
Tools:
- Socket wrench set: This is used to loosen and tighten bolts.
- Brake bleeder tool or syringe: This helps to remove air from the brake system. You can find these at most auto parts stores or online.
- Adjustable wrench: This is used to tighten and loosen fittings.
- Screwdriver: This may be needed to remove access panels or covers.
- Container: A clean container to collect the old brake fluid.
Materials:
- Fresh brake fluid: Ensure you use the correct type of brake fluid compatible with your vehicle’s brake system (e.g., DOT 3, DOT 4). You can find this information in your vehicle’s owner’s manual.
- Rags or paper towels: These are used to clean up spills and messes.
You can find most of these tools and materials at your local auto parts store or online retailers like Amazon, Walmart, or eBay.
If you’re unsure about which brake fluid to use, consult your vehicle’s owner’s manual or a mechanic.
Safety Precautions During Manual Manual Brake Bleeding
Here are some common mistakes you should avoid when bleeding your brake, especially using the manual method:
To protect yourself during manual brake bleeding:
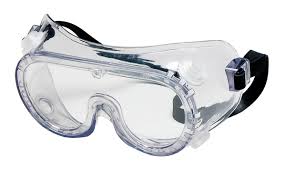
Wear Safety Glasses:

Brake fluid can splash and irritate your eyes.
Always wear safety glasses to protect your vision.
Avoid Touching Hot Brake Components:
The brakes can become very hot during normal operation.
Allow them to cool before working on them to prevent burns.
Use gloves:

Brake fluid can irritate your skin.
Wear gloves to protect your hands.
Also, you need to ensure your vehicle stability:
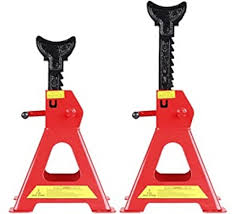
Use A Jack Stand:

Never rely solely on the jack to support your vehicle.
Place a jack stand under the frame of the vehicle at a safe height to provide additional stability.
Chock The Wheels:
Place wheel chocks in front of the wheels on the opposite side of the jack to prevent the vehicle from rolling.
However, brake fluid can damage paint and other surfaces.
Clean up any spills immediately with a rag or paper towel.
Also, brake fluid can ignite if exposed to high temperatures.
Keep it away from open flames or sparks.
Step-by-Step Guide To Manual Brake Bleeding
Step 1. Prepare Your Vehicle:
- Park on a level surface
- Loosen the lug nuts
- Raise the vehicle
- Remove the wheel
Step 2. Access The Bleeder Screw:
- Locate the bleeder screw: It’s usually located near the top of the caliper.
- Clean the area: Remove any dirt or debris from around the bleeder screw.
Step 3. Prepare The Brake Bleeder Tool Or Syringe:
- Fill the brake bleeder tool or syringe: Fill it with fresh brake fluid.
- Attach the tool or syringe: Connect the tool or syringe to the bleeder screw.
Step 4. Bleed The Brakes:
- Open the bleeder screw: Slowly turn the bleeder screw counterclockwise until brake fluid starts to flow.
- Pump the brake pedal: Have someone press the brake pedal slowly and steadily.
- Monitor the brake fluid: Watch for air bubbles in the brake fluid. Continue pumping the brake pedal until no more air bubbles appear.
- Close the bleeder screw: Tighten the bleeder screw with an adjustable wrench.
- Repeat for other wheels: Follow the same steps for the remaining wheels.
Step 5. Check The Brake Fluid Level:
- Check the brake fluid reservoir: Ensure the brake fluid level is between the “full” and “add” marks.
- Add brake fluid if necessary: If the level is low, add fresh brake fluid.
Step 6. Test The Brakes:
- Drive a short distance: Test the brakes by driving a short distance.
- Check for pulling or vibration: If you notice any unusual sensations, have a mechanic inspect your brakes.
Step 7. Reassemble The Wheel:
- Replace the wheel and tighten the lug nuts: Ensure the lug nuts are securely tightened.
- Lower the vehicle: Lower the vehicle using the jack.
- Tighten the lug nuts: Give the lug nuts a final tightening.
How To Test Your Brake After Bleeding?
Drive A Short Distance:
Find a safe, quiet area to test your brakes.
Avoid busy roads or areas with heavy traffic.
Check For Responsiveness:
Apply the brakes gently to check if they feel responsive.
The brakes should engage smoothly and without any delay.
Check For Stopping Power:
Apply the brakes hard to check if they provide adequate stopping power.
The vehicle should come to a complete stop without any pulling or jerking.
Look For Unusual Sensations:
Pay attention to any unusual sensations, such as pulling, vibration, or noise.
If you notice any of these symptoms, have your brakes inspected by a mechanic.
In addition, test your brakes on both flat surfaces and inclines to ensure they perform consistently.
After testing your brakes, check the brake fluid reservoir to ensure the level is between the “full” and “add” marks.
